-
COS configuration - Register device nodes(Duration: 2 mins)
In the Firefox browser, click Go! to enter the COS Graphic Management Interface.
A message stating "There are 4 devices pending approval (see below)." will pop up in the upper section.
Click see below, and you will see the page "Devices Pending Approval: 4".
After checking all the nodes, click the button Bulk Approve/Deny on the upper right corner to bulk approve or deny.
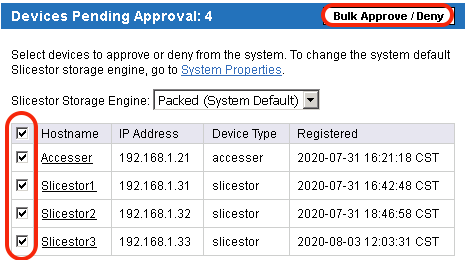
Click Approve.

-
COS configuration - Allocate devices to three sites(Duration: 3 mins)
Place Accesser and Slicestor1 into the site Beijing, and click the button Save.
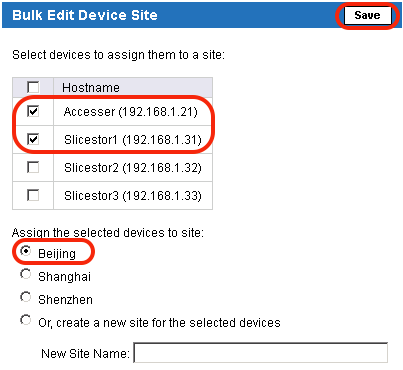
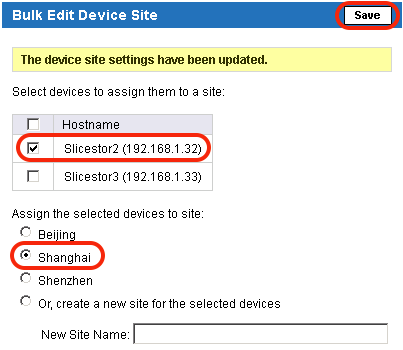
Place Slicestor2 into the site Shanghai, and click the button Save.
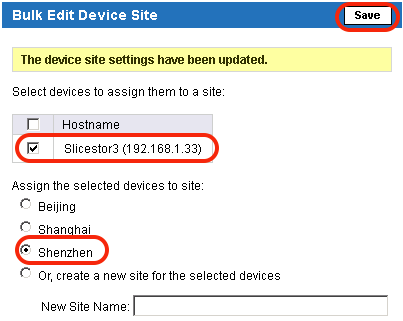
Place Slicestor3 into the site Shenzhen, and click the button Save.
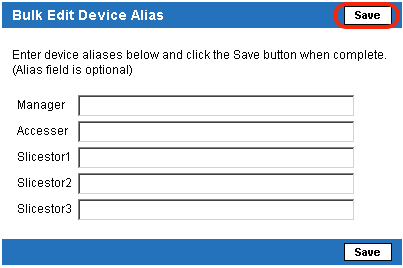
You may set an alias for each of them (or not), and then click the button Save.
-
COS configuration - View the hardware health(Duration: 5 mins)
Click Monitor at the top to return to the monitoring screen, and you will see that all the devices have been added to the cluster.

At the Monitor page, click Devices, and you will be able to view the distribution status and health of all the hardware, which can be deemed as healthy only when all the devices are marked green. For any device marked yellow or red, you may click it to view failure details.
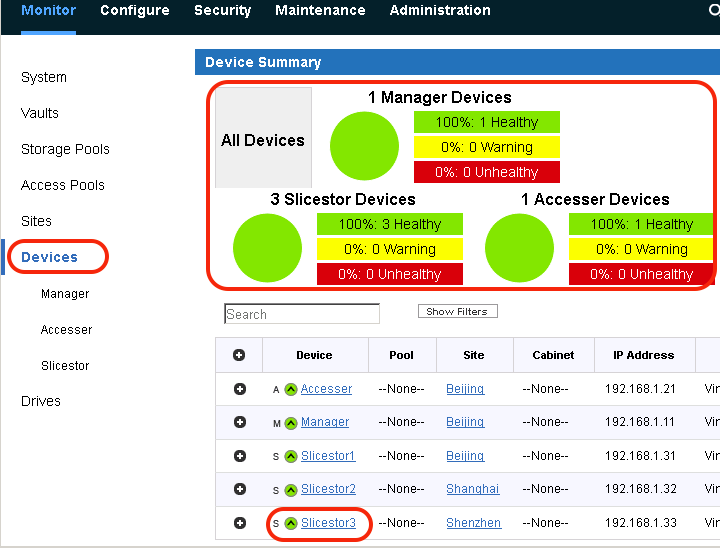
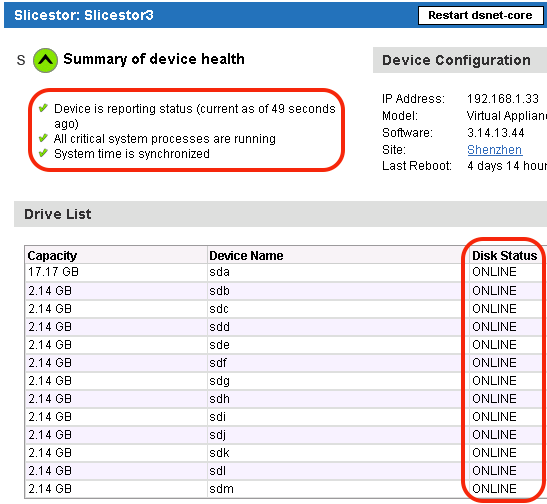
Click Slicestor3 to view its health: it can be deemed as healthy only when all the devices are marked green, and all disk status are ONLINE.
-
COS configuration - Create Storage Pool(Duration: 5 mins)
Both the storage layer and the access layer in the COS can be decoupled. So, we should create a storage pool to manage all the data storage nodes Slicestors, and in the next section, we will create a data access pool to manage all the access nodes Accessers.
Multiple storage pools and access pools are supported in a single cluster of COS. However, only one is created for this experiment due to limited quantity of devices.
Click Configure on the top, and select Create Storage Pool.

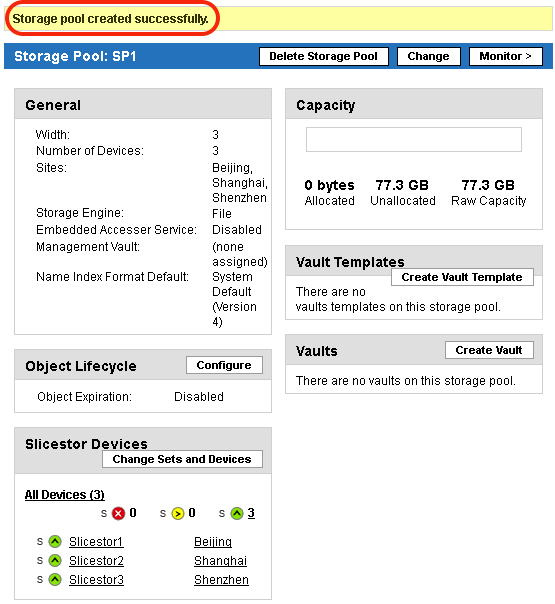
Configure it as indicated in the figure below, and then click Save to continue.
Type the name of the storage pool in the Name field, for which no special requirements are specified.
Type the width of the storage pool in the Width field, where 3 is the lowest value supported by COS.

Now, Click Save, and you will see that the storage pool SP1 has been created successfully.
-
COS configuration - Create Access Pool(Duration: 5 mins)
Click Configure at the top, and then select Create Access Pool.

Configure it as indicated in the figure below, and then click Save to continue.
Type the name of the access pool in the Name field, for which no special requirements are specified.
Select the type of interface provided externally in the API Type field: Cloud Storage Object = S3.
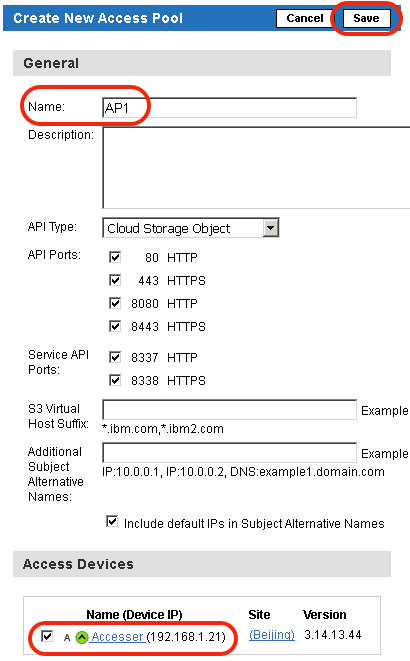
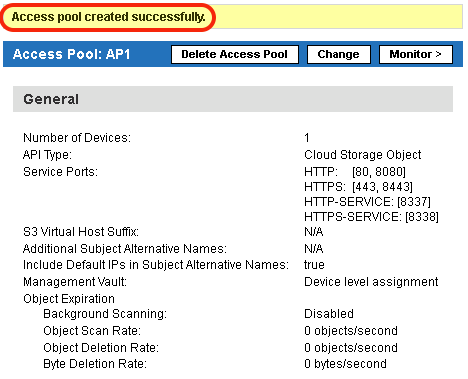
Now, click Save , and you will see that the access pool API has been created successfully.
-
COS configuration - Create Vault Template(Duration: 8 mins)
Click Configure at the top, and then click the button Configure to the right of Template Management.
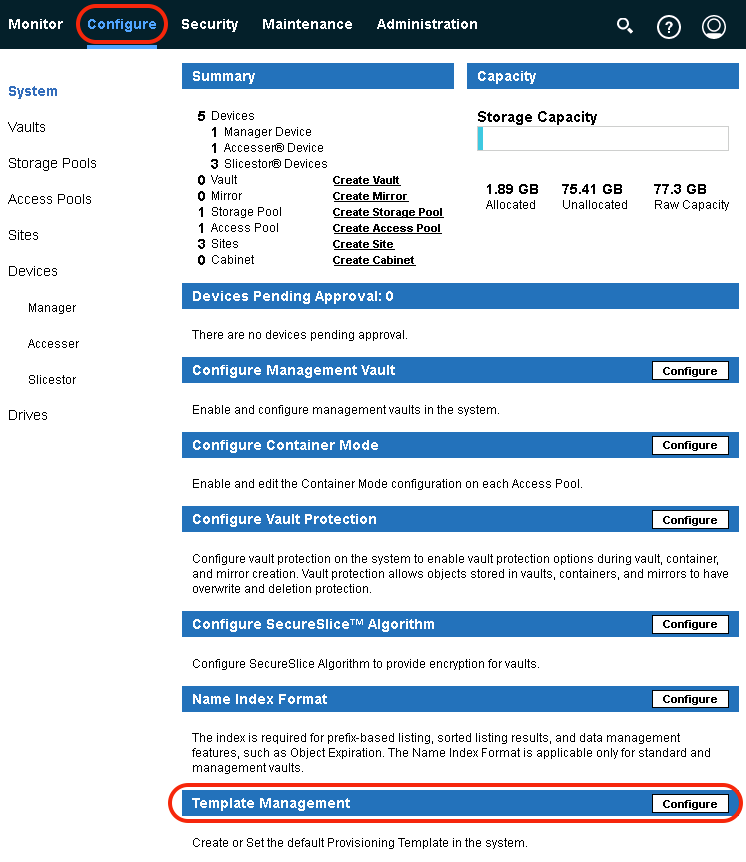
Select the Vault Template that is applicable for SP1, and then click the button Create.

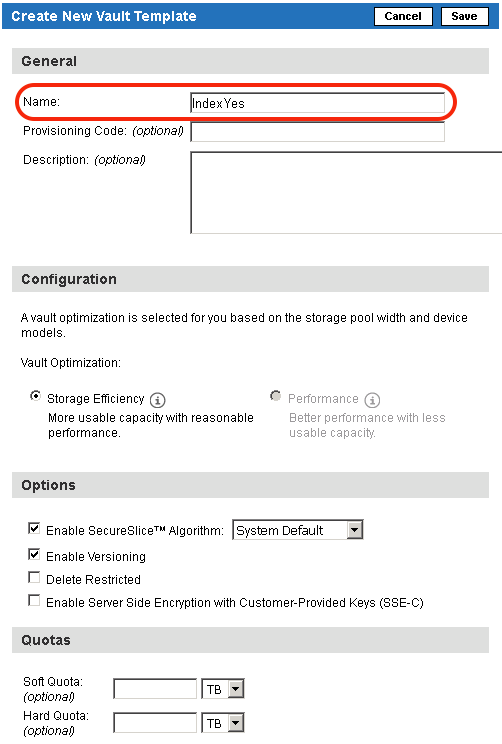
Configure the template with reference to the figure below.
Type the name of the template in the Name field, for which no special requirements are specified.
Configuration: Select the way to use the erasure code. For this demo environment, we only set up one way: storage first. COS supports multiple variable erasure codes, and you can consult your IBM technical representative for details.
Options: special configuration options; you may check one or more selectively.
Quotas: quota management.
Deployment: All the vaults created on the basis of this template will be distributed to the access pool API by default.
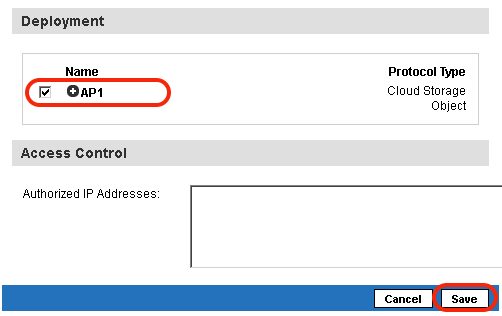
Click Save to complete the template creation step.
-
COS configuration - Specify the system default template(Duration: 2 mins)
Click Configure again and then click the button Configure to the right of Template Management.
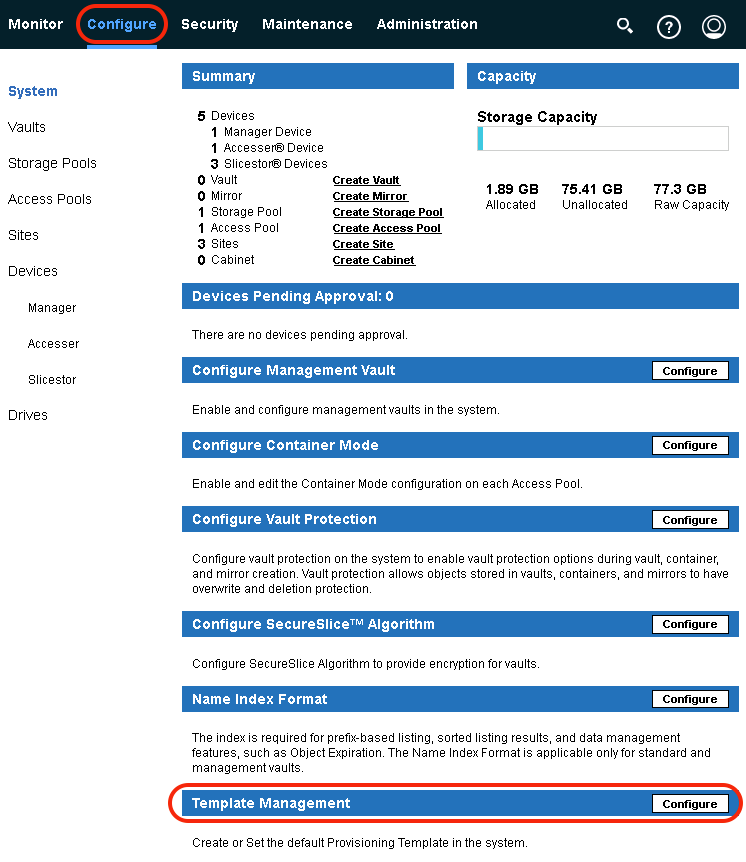
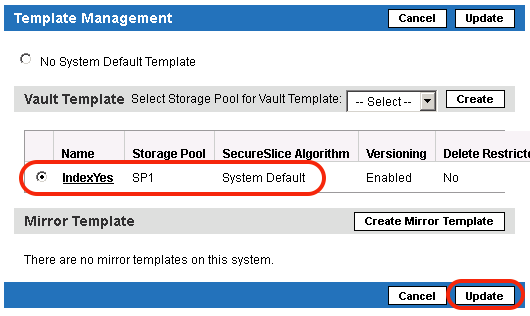
Configure the system default template: select the template IndexYes, and click Update at the right.
-
COS configuration - Create the Vault(Duration: 3 mins)
Vault means the Bucket in COS, and also the logic pool that provides object data storage.
The user may upload, download, modify and delete data by using the Vault when accessing the object storage.
Click Configure at the top and then select Create Vault.
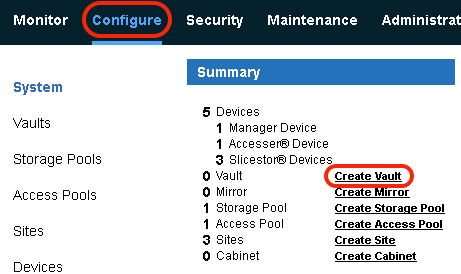
Select the template IndexYes, and then click the button Continue to continue. In this case, we create the Vault based on the template, and you can select other customization method.

Input the name of Vault.

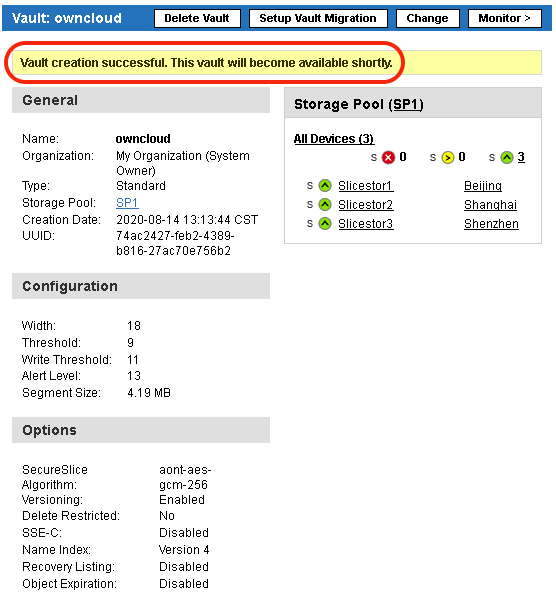
After clicking Save, the Vault has been created successfully, and you can see the following information:
-
COS configuration - Create the allocated user role(Duration: 6 mins)
Click Security at the top and then click the button Create Account to the right of Accounts.

Configure it with reference to the figure below.


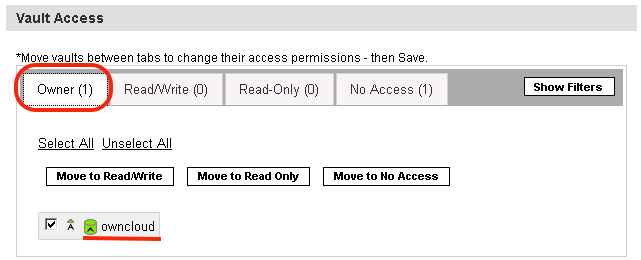
Then, click Save to save it.
-
COS Configuration - Generate the user access authentication key(Duration: 4 mins)
Click the user ibm for further configuration.

Click Change Keys to the right of Access Key Authentication. Create Access Key ID and Secret Access Key, which is the only accepted way of user authentication for S3 interface access.

Click Generate New Access Key to generate the Access Key ID.

Click Click to Show Secret Access Key to view the Secret Access Key.

View the results.

-
CloudBerry client access - View COS access IP(Duration: 4 mins)
Obtain the first information item that is necessary to access the Vault: IP address of Access node.
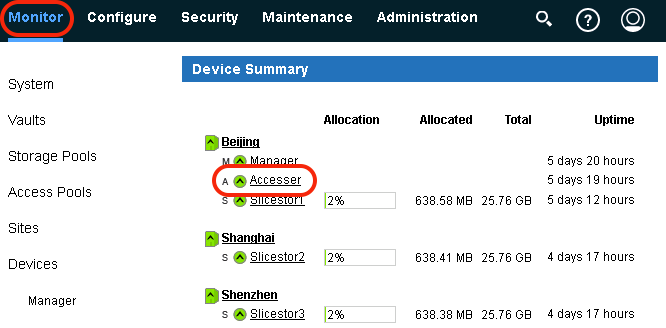
Click Monitor at the top, and select accesser1 under the Device Summary.
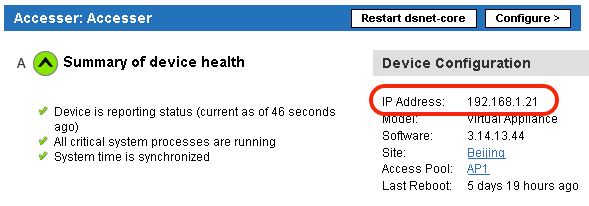
Obtain the IP address of Access node: 192.168.1.21 .
-
CloudBerry client access - View COS user key(Duration: 4 mins)
Obtain the second information item that is necessary to access the Vault: Access Key ID and Secret Access Key.
Click Security at the top, and select the User ibm under Accounts.

Click Show Secret Access Key to view the Secret Access Key.

Obtain Access Key ID and Secret Access Key.

-
CloudBerry client access - Associate the COS Vault(Duration: 4 mins)
At the Windows taskbar or the desktop, open  CloudBerry Explorer to pop up the Select Cloud Storage dialog box, and then double click S3 Compatible.

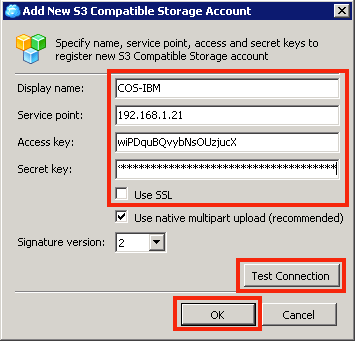
Click Add New S3 Compatible Storage account and configure it with reference to the figure below.
Display name: refers to the name of account (e.g. COS-IBM), for which no special requirements are specified.
Service point: type the IP address of Access node (192.168.1.21) that was obtained in the COS management interface here.
Access ID: copy and paste the Access Key ID that was obtained in the COS management interface here.
Secret Key: copy and paste the Secret Access Key that was obtained in the COS management interface here.
Use SSL: this option is removed from this experiment.
After completing these fields, click Test Connection to test connectivity; click OK if such test is completed successfully.
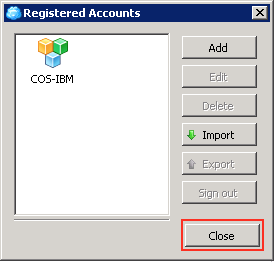
After see the newly-added account (e.g. COS-IBM), click Close.
-
CloudBerry client access - Access the Vault(Duration: 2 mins)
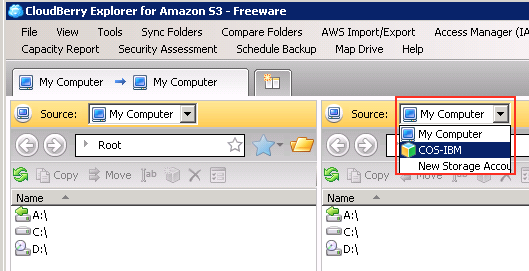
In the Source pull-down menu at the right, select the account previously created (e.g. COS-IBM).
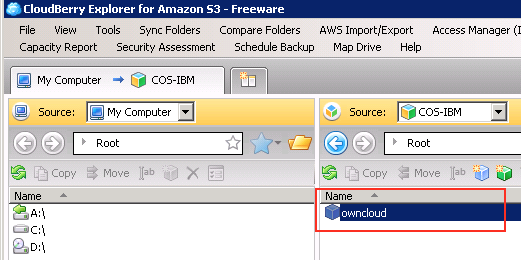
If you see owncloud, it indicates that the association is successful.
-
CloudBerry client access - Upload and download files(Duration: 6 mins)
Upload and download files in the Vault associated with CloudBerry
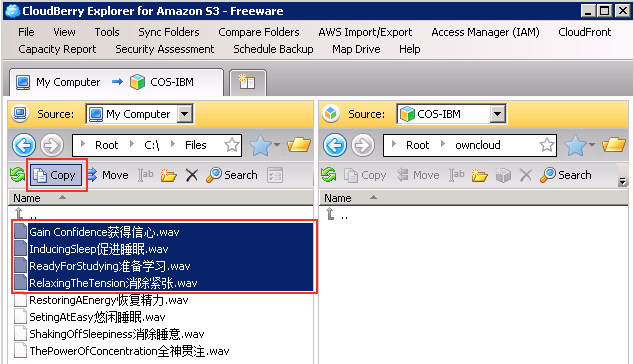
At the left, double click C:\ -> Files to enter the local directory.
At the right, double click owncloud to enter this Vault.

Select several files randomly, and then click Copy to complete the uploading step.
You may try to download or delete a file from owncloud.
Return to the COS management interface, click Monitor at the top, and select owncloud under the option System; you will see the storage utilization in several minutes.

-
CloudBerry client access - Create Bucket (Vault) from the client(Duration: 4 mins)
At the right of CloudBerry software, return the owncloud to Root, and then select New Bucket.
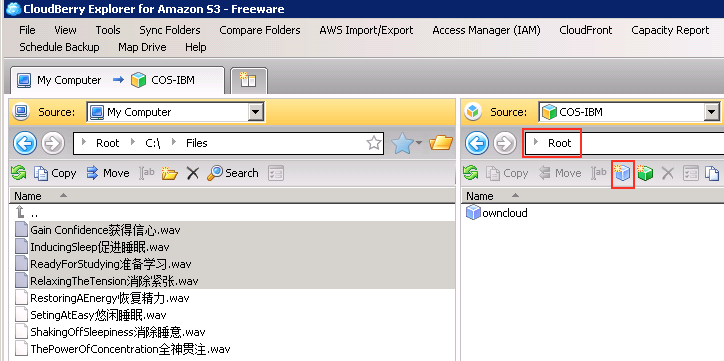
Type the Bucket Name (e.g. testbucket), and click OK.
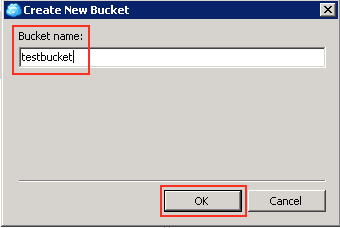
Now, you can see the Vault testbucket at the right.

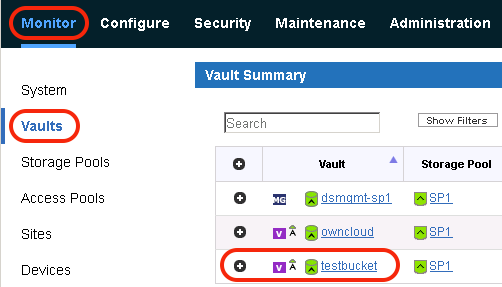
Return to the COS management interface, click Monitor at the top, and you will see the Vault testbucket under the option System, which indicates that the new Vault (or Bucket) has been created successfully.
-
Access to OwnCloud netdisk - Logon(Duration: 2 mins)
Here we use the free OwnCloud netdisk for netdisk connection testing.
The OwnCloud connects with the COS object storage system via the S3 interface.
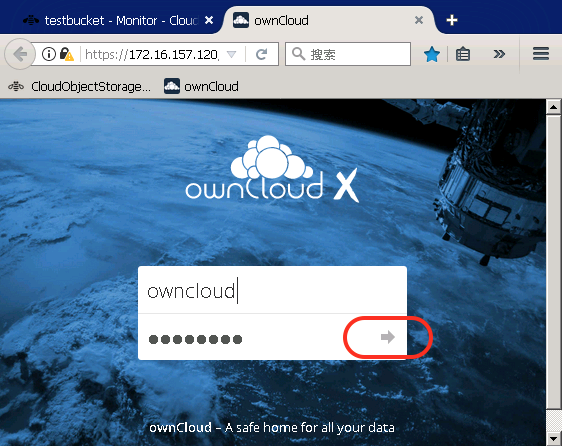
Log onto the OwnCloud.
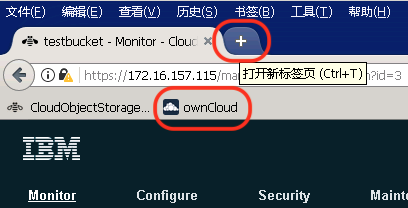
In the Firefox browser, click the sign ï¼ at the top to open a new tab, and then click ownCloud in the bookmark bar below to open the ownCloud management interface.
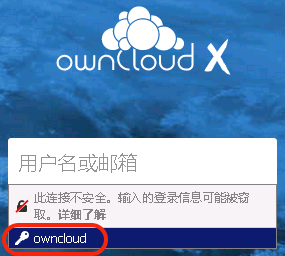
Then, click the right arrowâ¡ï¸ to log onto the OwnCloud.
-
Access to OwnCloud netdisk - Configure the connection with COS(Duration: 8 mins)
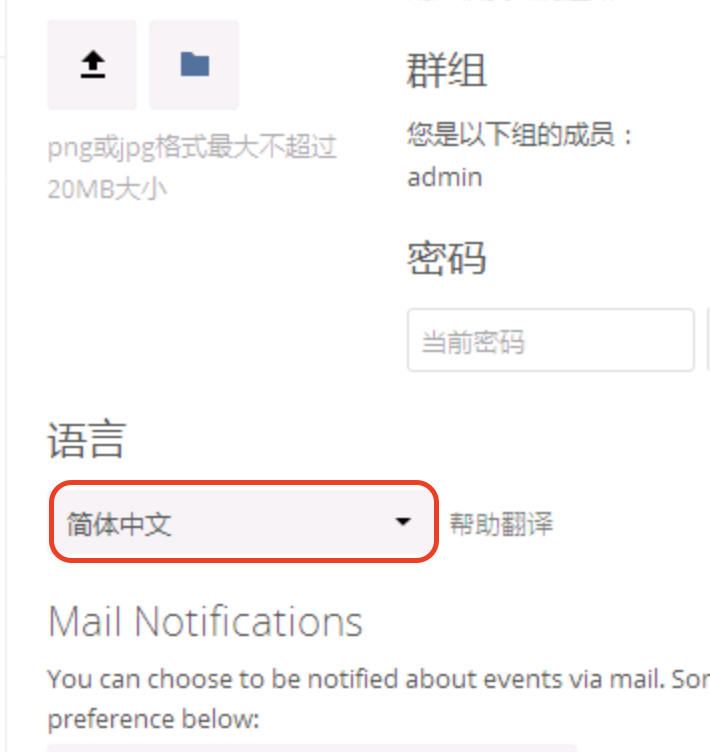
Click the owncloud pull-down menu at the upper right corner, and then click 设置.

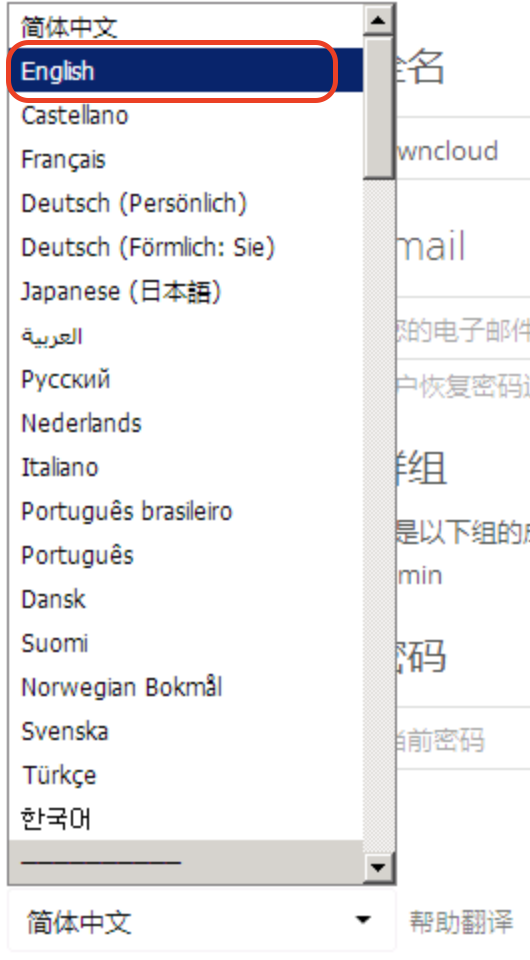
Click “语言”->"简体中文" and change it to “English”
Click Storage under the Admin option in the left-hand navigation bar, and then check Enable external storage.
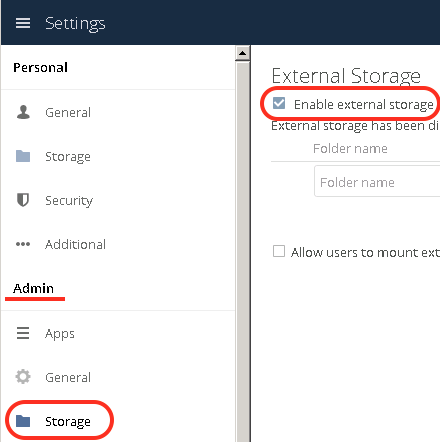
Configure appropriate parameters as per the figure below. If the front green indicator lights up, it indicates successful connection.
Folder Name: refers to the name to be displayed in the OwnCloud, e.g. COS.
External storage: select the Amazon S3 interface.
Authentication: select the Access Key.
Configuration:
- Bucket: owncloud, which is the name of Vault in COS, and the access user must be authorized as an Owner; all the letters in this name must be in lower case.
- Host: 192.168.1.21, i.e. IP address of access node in COS.
- Port: port 80 by default.
- Enable Path Style: YES
- Access Key and Secret Access Key: information of the user's (IBM) keys.
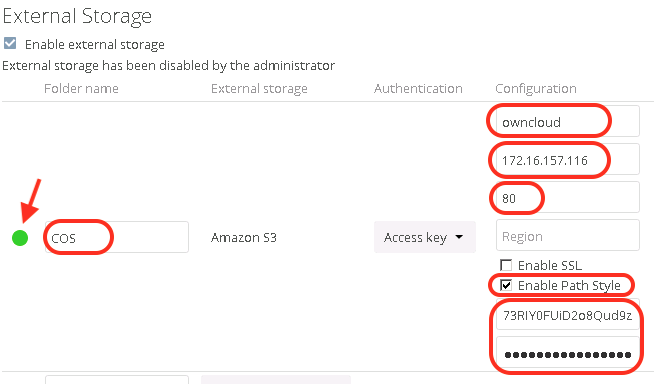
If the front green indicator lights up, it indicates successful connection.
-
Access to OwnCloud netdisk - Access the Vault(Duration: 3 mins)
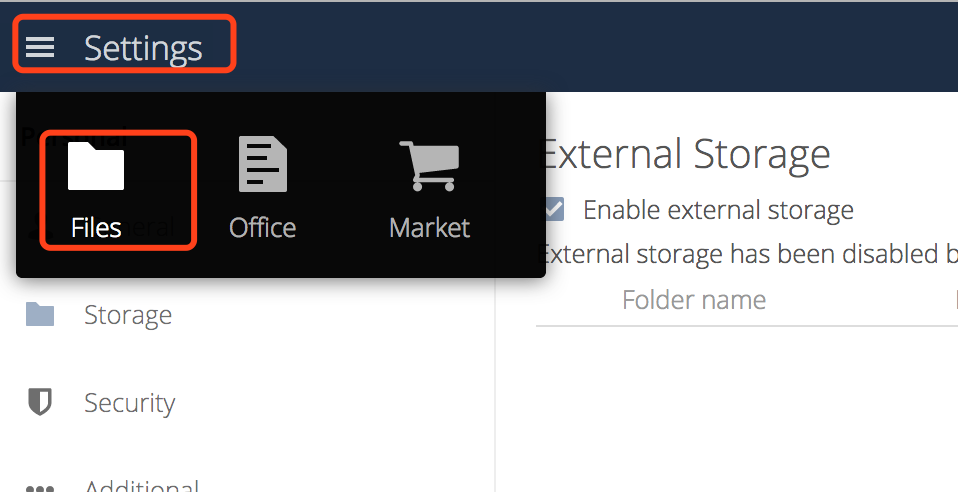
Click the Settings at the upper left corner, then click Files to back to the main page.
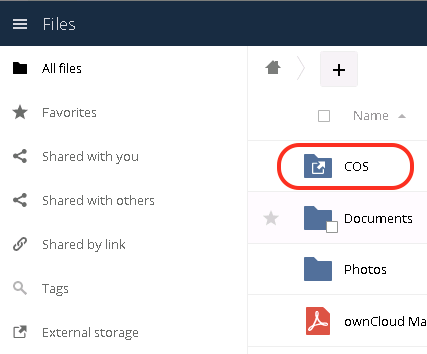
Now, you will see that the COS directory appears in the list. Click COS to enter the COS directory.
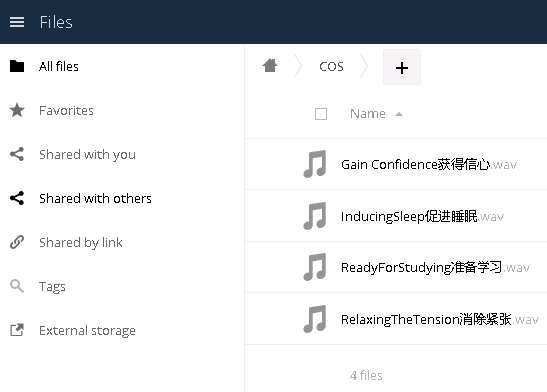
Then, you will see the file that was uploaded via CloudBerry, which indicates successful connection.
-
Access to OwnCloud netdisk - Upload the file(Duration: 5 mins)
Upload a file into the COS directory of ownCloud
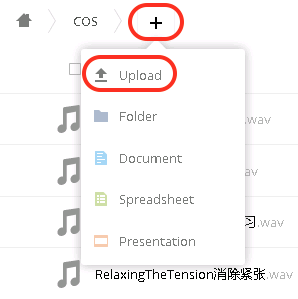
Click the sign + at the top and then select Upload.
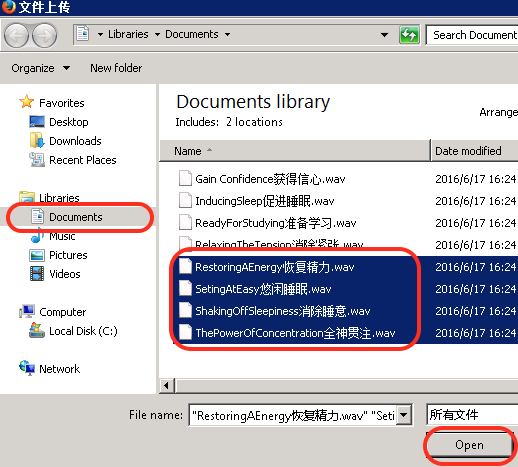
Select the file to be uploaded, and then click Open.
You will see the new file once the uploading is completed.
Return to the CloudBerry, and you will also see the new file under the ownCloud.
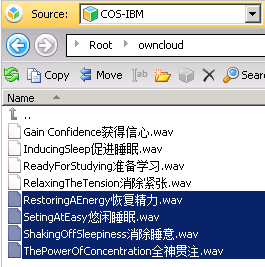


 CloudBerry Explorer to pop up the


